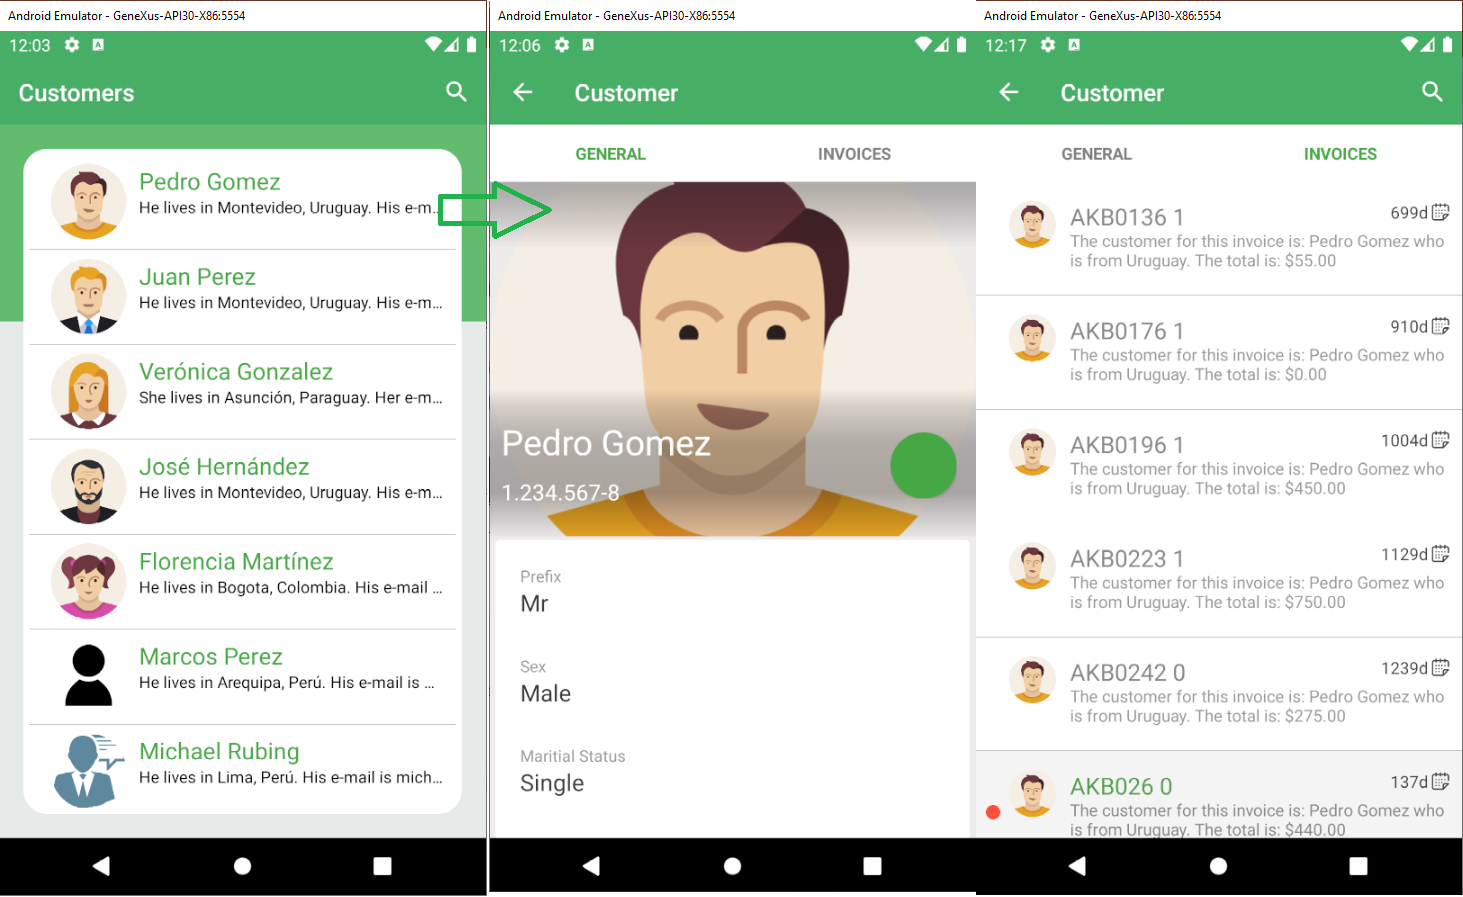
In this lesson you will learn how to add more controls to the Detail panel created in the previous step. When the exercise is completed, the panel will show the customer’s information (as before), along with information about the invoices associated with that customer. The panel will be separated in two tabs with each piece of information.
Follow these steps:
- Open the “CustomerDetail” panel created in the previous exercise.
- Add a “Tabs” node to the specification root node.
- Add two “Tab” nodes to that “Tabs” node. Name these tabs “General” and “Invoices”.
- Move the “Content (SDDetailStandardPrimaryAction)” node to the first tab.
- We must now add a grid with the customer’s invoices to the second tab. To do so, select the second “Tab” node and execute the “Add Grid From Transaction” action (available in its contextual menu). Choose the “Invoice” transaction, and then choose the layout “Notification List”. Create the grid using attributes.
- Assign the "CustomerPhoto" attribute to the "Photo" node, the “InvoiceDate” attribute to the “Date” node, the “InvoiceSearchResult” attribute to the “Summary” node and the "InvoicePaymentReceived" to "IsRead" attribute.
- Delete all filters except for InvoiceCode filter.
- Execute the application by running CustomerList, and see the result. It should look like the image below.
 |
| Advanced detail panel |
|