To use this service, follow these steps:
- Create an account in their website. Choose the pricing plan best suited to your scenario.
- Create a keypair to authenticate with the server. We recommend using the commands described here.
- Upload the public key in PEM format to their website.
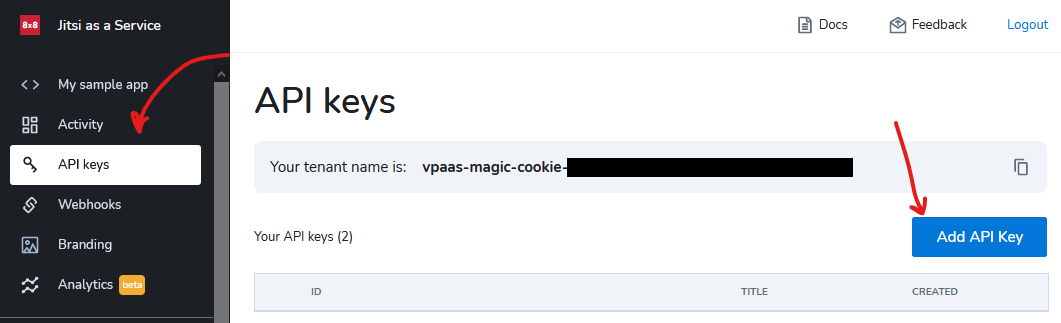
- Go to the API Keys section.
- Click on the "Add API Key" button.
- Click on "Add public API Key".
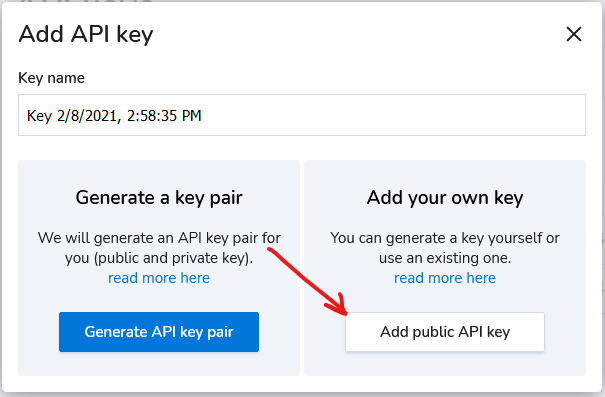
- Paste the contents of the public key file in PEM format and save.
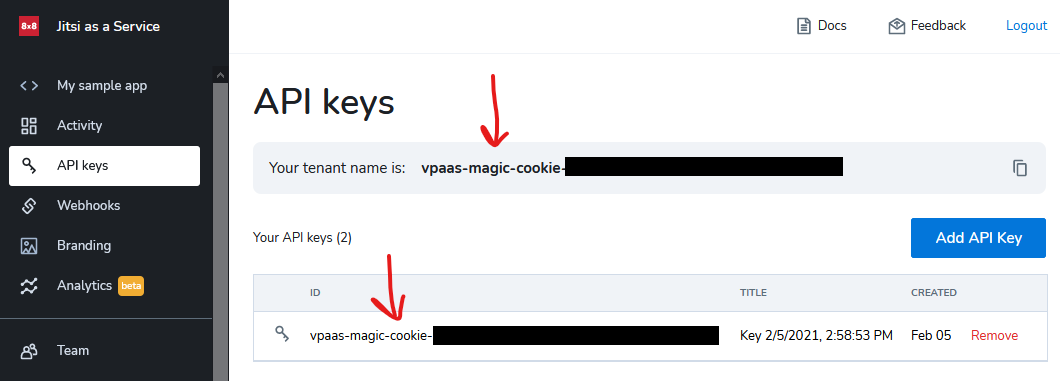
- The new key should be listed in the API Keys section, along with its identifier.
- From the API Keys section, copy the tenant name and the API Key ID.
 . .
- Complete the LoadJitsiConfiguration object as shown below, replacing the highlighted sections with the values copied in the previous step and the location/password of the pkcs12 file created in the second step.
&JitsiConfiguration = new()
&JitsiConfiguration.Domain = "8x8.vc"
&JitsiConfiguration.UsePassword = False
&JitsiConfiguration.UseToken = True
&JitsiConfiguration.TokenAlgorithm = JWTAlgorithm.RS256
&JitsiConfiguration.TokenKey = ""
&JitsiConfiguration.Kid = <YOUR_API_KEY_ID>
&JitsiConfiguration.UserControlRoomNamePrefix = <YOUR_TENANT_ID> + "/"
&JitsiConfiguration.Sub = <YOUR_TENANT_ID>
&JitsiConfiguration.Iss = "chat"
&JitsiConfiguration.RoomNameTemplate = "K2BT_Collaboration_%ROOM_GUID%"

&JitsiConfiguration.TokenPrivateKeyFilePath = <PATH_TO_PRIVATEKEY_FILE>
&JitsiConfiguration.TokenPrivateKeyAlias = "1"
&JitsiConfiguration.TokenPrivateKeyPassword = <PRIVATEKEY_PASSWORD>

&JitsiConfiguration.TokenCertificateFilePath = <PATH_TO_CERTIFICATE_FILE>
&JitsiConfiguration.TokenCertificateAlias = "1"
&JitsiConfiguration.TokenCertificatePassword = <CERTIFICATE_PASSWORD>
Note that <PATH_TO_PRIVATEKEY_FILE> and <PATH_TO_CERTIFICATE_FILE> may reference the same file (in this case, <PRIVATEKEY_PASSWORD> and <CERTIFICATE_PASSWORD> should be the same).
|