You can now insert data using the interfaces generated by the EntityServices pattern. In this exercise we will review some of the other features provided by this pattern.
- Run "WWProduct" Web Panel.
- Select a product, and click on the update action.
- Update the product’s price, and confirm the transaction.
- A message similar to the following will be shown.
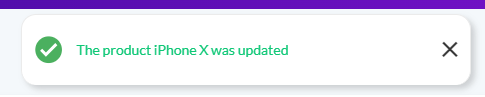 |
| Feedback Message |
Note: The contents of these messages can be customized in the Transaction Node, in the “After (insert|update|delete) Message” properties.
 |
| Feedback Message Configuration |
- Go to the “Products” option in the application’s menu.
- Open the “Grid Settings” menu. Inside it, uncheck the “Type” option.
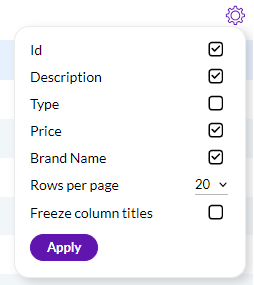 |
| Grid Settings Menu |
- Click on the “Apply” action.
- You can now see how the “Type” column is no longer visible.
 |
| After Saving Grid Settings |
Note: Visible columns are stored in the Web Session by default. The developer may extend this behavior to persist this behaviour in the database, using the “K2BPersistGridColumns” procedure.
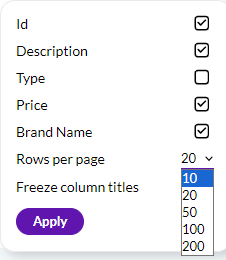
- Open the “Grid Settings” menu.
- Change the “Rows Per Page” option to “10”.
 |
| Grid Settings Rows Per Page Option |
- Click on the “Save” action and see the result in the grid.
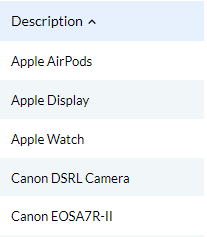
You can order the grid by clicking on the column title of an attribute having an associated SimpleOrder in K2BEntityServices instance.
- Click on the "Description" column. See how the order of the elements in the grid changes.
 |
| Oder by Grid Column |
- Click on the “PDF Report” and “Export” actions and see their behavior.
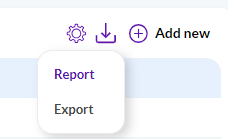 |
| Excel and PDF Report Actions |
Note: Reports are generated for WorkWith and SubWorkWith interfaces. Yo can disable this generation in the Standard Actions node.
With this property, you can reorder your columns in runtime.
- Go to your WorkWith and click on "GridColumns" node inside "Work With" node.
- Change "Allow Runtime Column Reorder" to "Yes".
 |
| Allow Runtime Column Reorder |
- Build your aplication (F5) and reorder your columns in runtime.
The import from CSV action allows the end user to select and upload a CSV file containing records that should be imported in the application's database.
For the following step you will have to download this file.
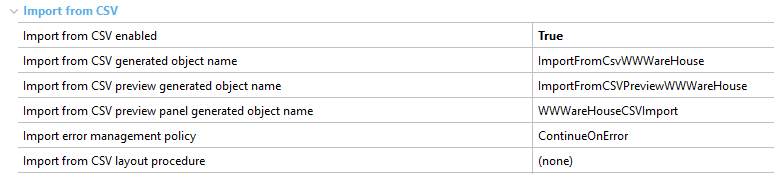
- Open Warehouse transaction and go to pattern section.
- Inside EntityServices, click on "Standard actions" node and change "Import from CSV enabled" to "True.
 |
| Import from CSV |
- Build your application and go to ""WWWarehouse" panel.
- Click on download icon and select "Import from CSV" option
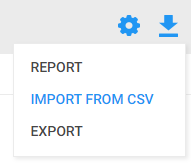 |
| Import from CSV |
- Click on "Add files" and select the csv file you downloaded before.
- Confirm in order to add data.
It is also possible to export all the data of your table to a CSV file.
In order to do so, follow these steps:
- Open Warehouse transaction and go to pattern section.
- Inside EntityServices, click on "Standard actions" node and change "Export to CSV" to "True.
 |
| Export to CSV |
- Build your application and go to ""WWWarehouse" panel.
- Click on download icon and select "Export to CSV" option
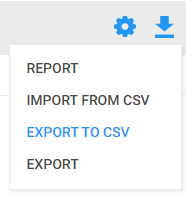 |
| Export to CSV |
- Check the file you just downloaded.
|