In this lesson you will see how a “List” SD Panel can be created with SD Designer.:
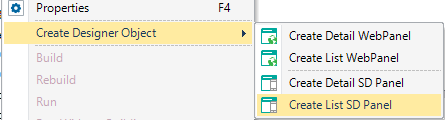
- Find the “Customer” transaction in the KB Explorer.
- In its contextual menu, execute the action “Create Designer Object -> Create List SD Panel”.
 |
| Create List SD Panel |
Note: At this point, a warning may be shown, indicating that the KB’s Basic Objects are outdated. Click “OK” to import the latest version of these objects. This occurs only once, the first time the tool is used.
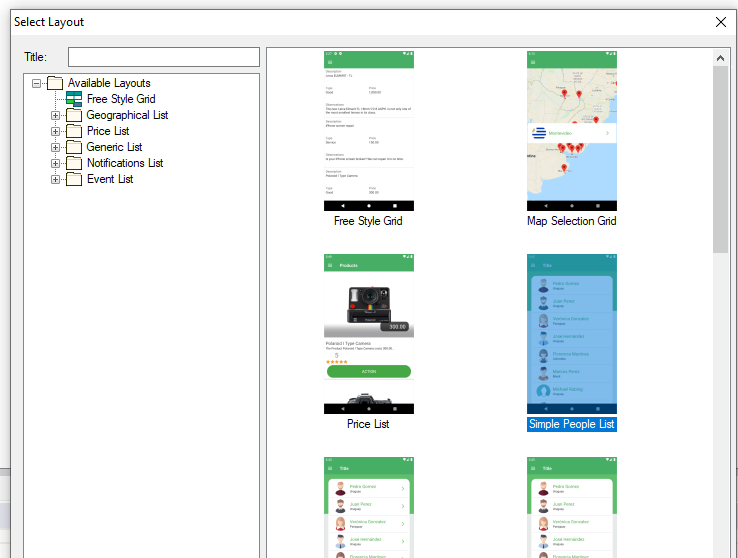
- When executing that action, we have told SD Designer that we wish to create an SD Panel containing a list of customers. Now, a dialog will be shown so that you can select the list’s design. In this exercise, select the “Simple People List” option.
 |
| Layout selection |
- A dialog will appear where you must choose to create the grid using attributes or variables, choose attributes for this example.
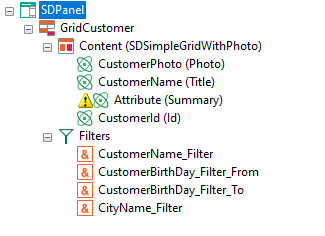
- At this stage, SD Designer will analyze the transaction’s structure to infer which attributes should be used in the grid, and which filters to use. With this information, a new SD Panel will be created with the “Designer” part initialized. The generated tree will look like the following image.
 |
| SD Panel initialization |
- Select the “CustomerSearchResult” attribute in the “Summary” node.
 |
| Summary attribute selection |
- Set the title to “Customers” in the root node.
- Delete the “FromCustomerBirthday”, “ToCustomerBirthDay”, and “CityName” filters.
- Save the panel with the name “CustomerList”.
- Set the “Main Program” property to “True”.
|