|
In this exercise we will update a transaction where the EntityServices pattern was applied.
- Apply the EntityServices pattern to the Customer transaction.
- Perform these modifications in the instance:
- In the "Standard actions" node, set the “After Insert navigation” property to “ReturnToCaller”.
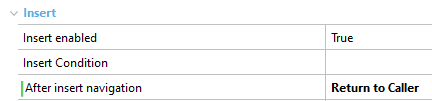 |
| After Insert navigation Property |
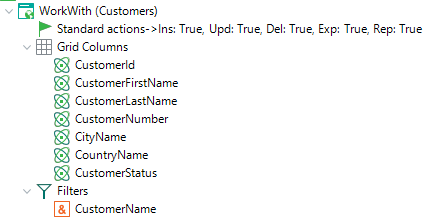
- From the “WorkWith” node:
- In GridColumns delete all attributes from the grid, except for: CustomerId, CustomerFirstName,CustomerLastName, CustomerNumber, CityName, CountryName, CustomerStatus.
- Delete all filters except for “CustomerName".
 |
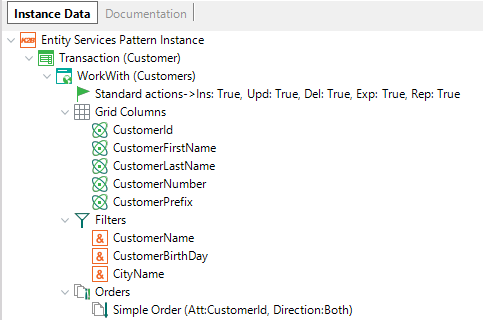
| Customer Instance |
- In the “SubWorkWith(Invoices)” node, delete all attributes except from: “InvoiceCode”, “InvoiceDate” and “InvoiceTotal".
- In the “SubWorkWith(Invoices)” node, delete the filter: “InvoiceExpirationDate”.
- Apply the EntityServices pattern to the Invoice transaction.
- Perform these modifications in the instance:
- In the “WorkWith” node, delete these attributes: “InvoiceLastLine”, “InvoiceExpirationDate”, “InvoicePaymentReceived”, “InvoiceTax”, “InvoiceDateFormat”.
- In the “Filters” node, delete the “InvoiceExpirationDate” filter.
- Generate and run the application to see the result.
- Create a Customer and an Invoice to see how the interfaces work by default.
When using patterns, two options are available: The first one is to edit the pattern instance inside the transaction and the other option is to edit the Pattern object directly, by opening the object in the Folder View.
 |
| Pattern object in the folder view |
Opening this object you can edit the pattern instance directly.
 |
| Entity Services Instance |
The advantage of the second option is that the pattern is not applied each time it is saved, it is automatically applied before generating the application instead. If you need to force the application of the pattern before that, you can use the “Apply Pattern” action, as seen below.
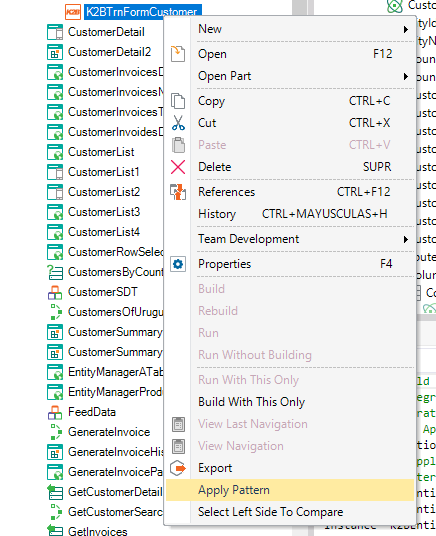 |
| Apply Pattern Action |
K2BEntityServices updates the definition of the transaction it is applied on. In order to do so, it uses code slots. Slots are sections of GeneXus code delimited by comments. They start with a comment of the form “//+ <owner>.<functionality><.Fixed>” and end with a comment “//-”. You can see more details in Code slots in Rules and Events, in this exercise we will learn how these slots work in a practical manner.
- Open the Invoice transaction, and enter its “Rules” part.
- At the bottom (outside all slots) place the following rule: "serial(InvoiceLineId, InvoiceLastLine, 1);"
- Save the transaction. You can verify that the rule is not modified.
- Open the Customer transaction, and enter its “Rules” part.
- Locate a “Fixed” slot. To do this, look for the postfix “.Fixed” in the slot’s name.
- Add a comment such as “// I’m inside the Fixed slot” to the slot.
- Save the transaction. You can verify that K2BTools deleted the comment you just added.
- Open the Customer transaction, and enter its “Rules” part.
- Locate a “Non-Fixed” slot. To do this, look for a slot without the “.Fixed” postfix as in the following example:
- Add a comment such as “// I’m inside a non-fixed slot”.
- Save the transaction. You can verify that K2BTools did not delete the comment you just added.
In this exercise, we have seen that the following rules must be followed by the developer:
- The developer can add code outside the slots.
- The developer can add or update code in “Non-Fixed slots”.
- The developer can NOT add add code in “Fixed slots” (as they will be deleted).
|