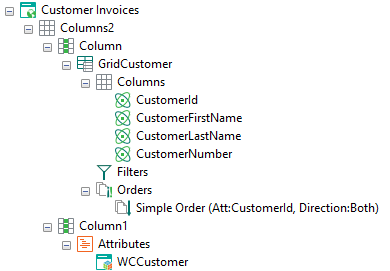
- Right click on "Customer Invoices" node and add a columns node. Inside this columns node, add two columns.
- Cut and paste "GridCustomer" inside one of the columns, and do the same with the node "Attributes" inside the other column.
 |
| Columns Preview |
Note: Columns node h
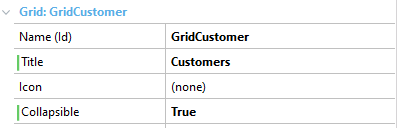
- Change the "GridCustomer" title property to "Customers" and change the collapsible property to "true".
 |
| GridCustomer Result |
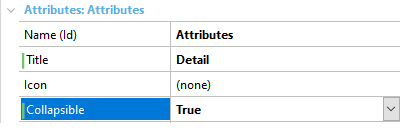
- Set the title property of the "Attributes" node to "Detail" and the collapsible property to "true".
 |
| Attributes Result |
- Modify the title propety of the "GridInvoices" to "Invoices".
- Change the "Rows per page" property of the node "Columns" inside "GridCostumer" to 30.
- Move "GridCustomers" to the bottom of the designer tree.
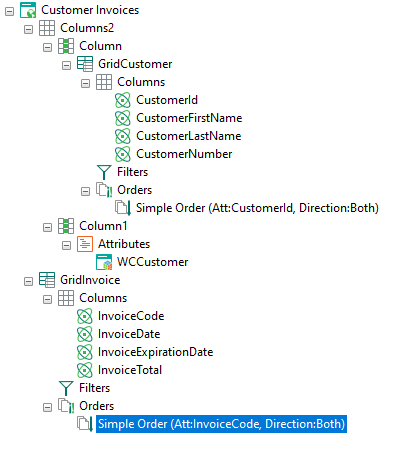
- This is how your designer tree should look by now:
 |
| Designer Tree |
The Web Panel is complete, you can execute it now to see it in action!
|