In this final step, we are going to confirm the invoices payment and to finish the wizard. When the user presses the finish button, some actions should be triggered in order to complete the wizard. The developer can add code to decide what will happen when the wizard is finished, and perform global validations on the data entered by the user.
First, we will create a step that is going to display the payment that is going to be confirmed. This step is going to be very similar to the one created in the last exercise.
- Right click on "Steps" node and create a new step using "Actions>Create Wizard Step" with name "PaymentConfirmation".
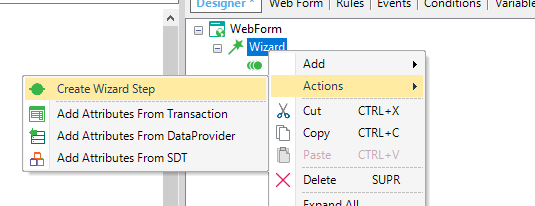 |
| Create Wizared Step Action |
- Select "PaymentMethod", "PaymentDate", "InvoiceCode", "PaymentTotal" and "InvoiceTotal" fields and choose "Show Fields" option.
 |
| Selected Fields with "Show Fields" |
- Click on "PaymentInvoiceSDT.PaymentDate" and set the "Element Relative Position" property to "New cell" and save.
- Go to "Attributes" node and do the following changes to the Resposive Sizes:
- Set "PaymentInvoiceSDT.PaymentMethod" and "PaymentInvoiceSDT.PaymentDate" width to 25%.
- Change "PaymentInvoiceSDT.PaymentMethod" and "PaymentInvoiceSDT.PaymentDate" offset to 42%.
|