As mentioned before, there are two ways of creating wizard steps. If the WebPanel associated with the step does not exists, the action Create Wizard Step can be used. In this action the name of the step and the SDT fields needed to be used in the WebPanel can be selected. This type of creating step is the one we are going to use in this exercise. In order to do so, follow these steps:
- Right click on "Steps" node and create a new step using "Actions>Create Wizard Step" with name PaymentInformation.
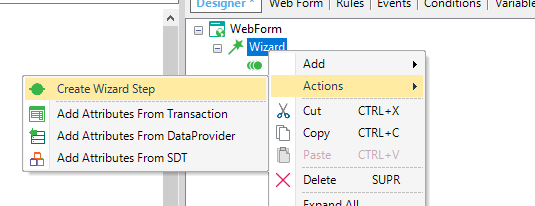 |
| Create Wizared Step Action |
- Select "PaymentMethod", "PaymentDate", "InvoiceCode", "PaymentTotal" and "InvoiceTotal" fields and click on create step.
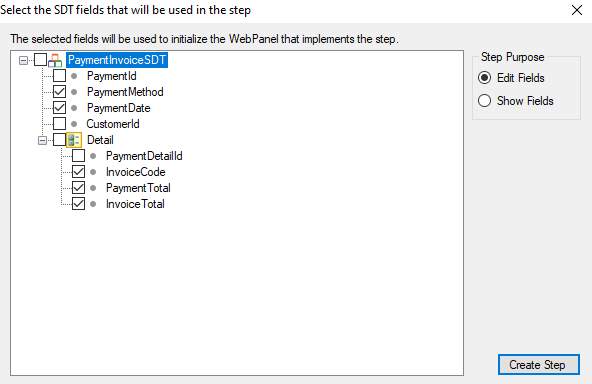 |
| Selected Fields |
- Click on "PaymentInvoiceSDT.PaymentDate" and set "Element Relative Position" property to "Sane Cell" and save.
- Go to "Attributes" node and do the following changes to the Resposive Sizes:
- Set "PaymentInvoiceSDT.PaymentMethod" and "PaymentInvoiceSDT.PaymentDate" width to 25%.
- Change "PaymentInvoiceSDT.PaymentMethod" and "PaymentInvoiceSDT.PaymentDate" offset to 42%.
- Modify "PaymentInvoiceSDT.Detail.InvoiceCode" and "PaymentInvoiceSDT.Detail.InvoiceTotal" Readonly property to "True".
When the Next or Finish (if it is the last step) action is executed, the event GlobalEvents.K2B_WizardConfirm is fired. This event will call the U_WizardConfirm subroutine.
- Go to "Events" tab and add the following code to the subroutine "U_WizardConfirm".
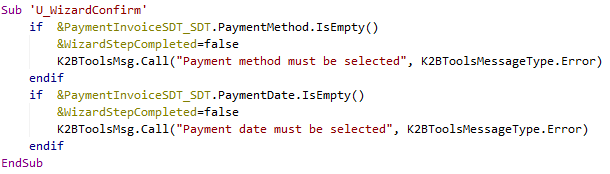 |
| Wizard Confirm Code |
Code should be added in order to decide whether the step was successfully completed or not. If the step is not successful the &WizardStepCompleted variable must be set to false. In this case the wizard will not continue to the next step.
|